How To Clear Microsoft Word Recent Documents
Microsoft Word is the most commonly used text editor for decades. It allows you to create and manage your documents efficiently. It has a tradition of monitoring the history of your documents and it always displays it whenever you launch Microsoft Word in order to provide you with quick access to your recently used documents. However, at times, people do not want Microsoft Word to keep track of their documents. In this article, we will explain to you the methods through which you can clear or disable the Recent Documents List in Microsoft Word.
How to Clear the Recent Documents List in Microsoft Word?
Whenever you clear the recent documents list or a single document in Microsoft Word, the said documents disappear temporarily until you reopen them again. As soon as you will reopen the same documents, they will immediately become a part of the recent documents list in Microsoft Word. In order to clear the Recent Documents List in Microsoft Word, you will need to perform the following steps:
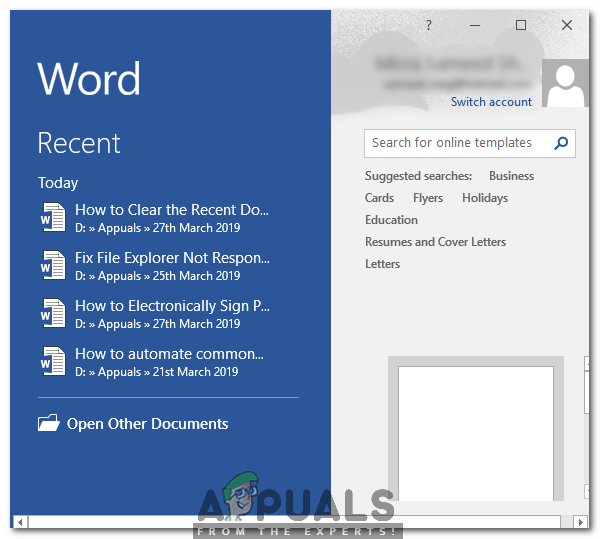
- Type Microsoft Word in the search section of your taskbar and click on the search result to launch the Microsoft Word window. The newly opened Microsoft Word window is shown in the following image:
- Now right click on any document located under the Recent heading in order to launch a pop-up menu as shown in the image below:
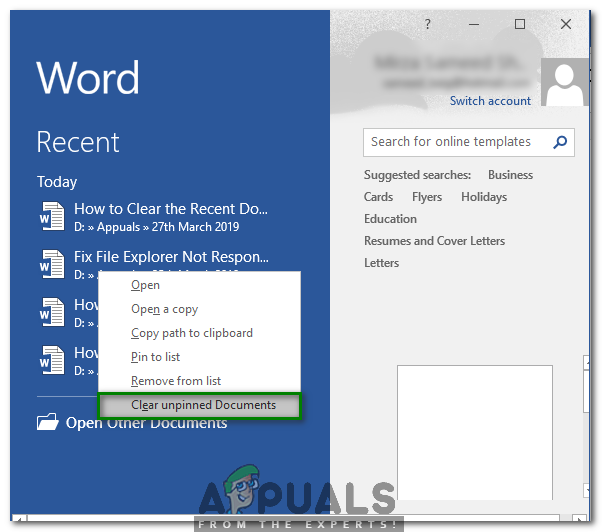
- Select the Clear Unpinned Documents option from this menu as highlighted in the image shown above.
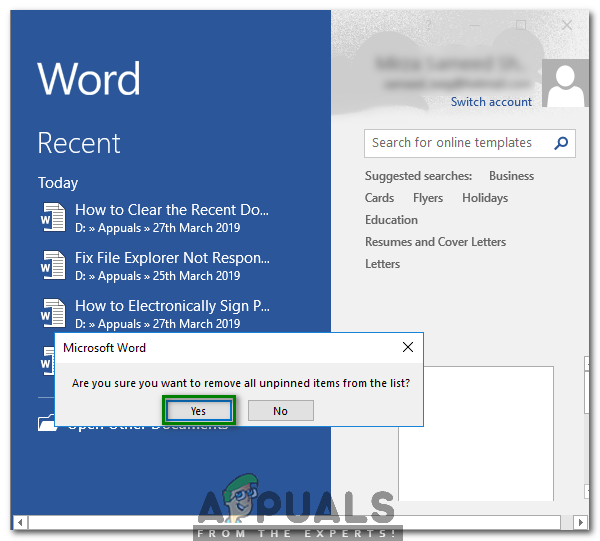
- As soon as you will click on this option, a warning message will appear on your screen. Click on the Yes button located on this warning message box as shown in the following image in order to clear the whole Recent Documents List in Microsoft Word.
- You can also choose to delete a single Microsoft Word Document. For doing that, right click on that specific document in order to launch a pop-up menu as shown in the image below:
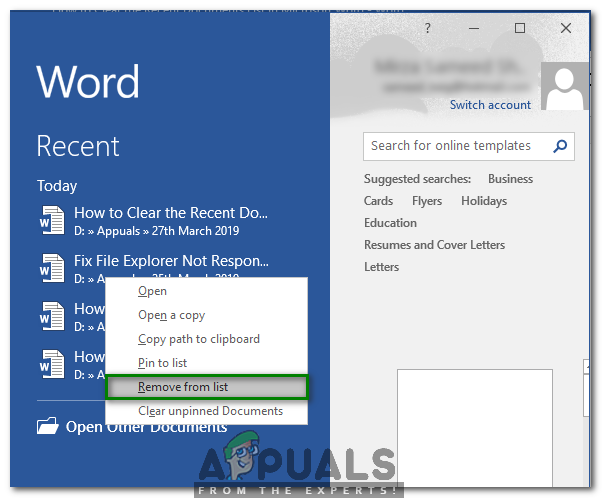
- Finally, select the Remove from List option from this menu as highlighted in the image shown above.
How to Disable the Recent Documents List in Microsoft Word?
If you want to permanently stop Microsoft Word from keeping a track of your recent documents, then you will need to disable the recent documents list in Microsoft Word. Doing this will prevent Microsoft Word from displaying your recent documents list until you enable this feature again. In order to disable the Recent Documents List in Microsoft Word, you will need to perform the following steps:
- Type Microsoft Word in the search section of your taskbar and click on the search result to launch the Microsoft Word window. The newly opened Microsoft Word window is shown in the following image:
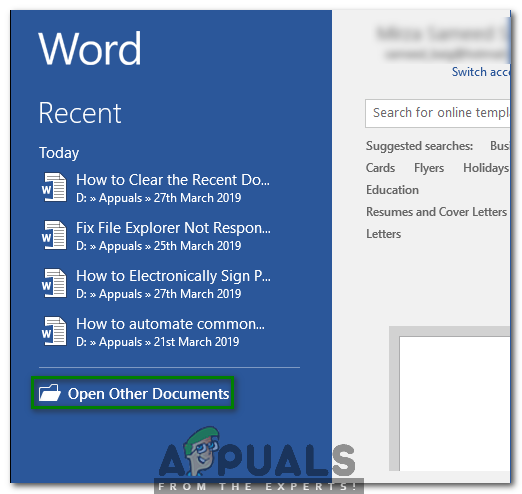
- Now click on the Open Other Documents option as highlighted in the image shown above.
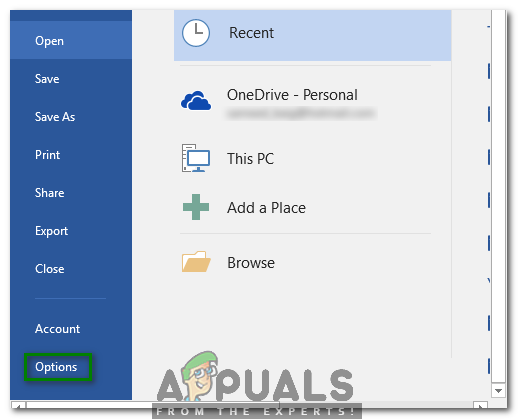
- Click on the Options tab as highlighted in the image shown below:
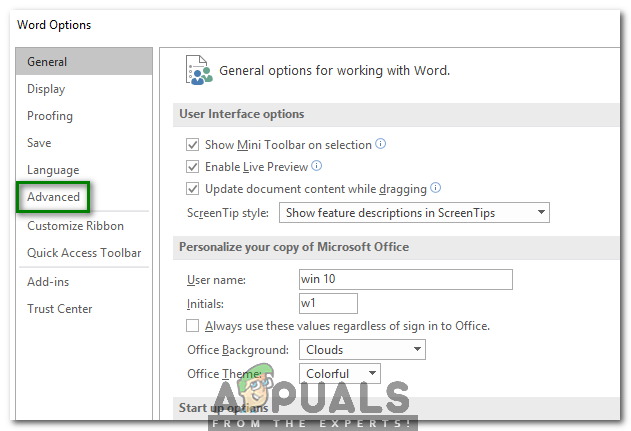
- In the Word Options window, click on the Advanced tab as shown in the following image:
- Now scroll down to the Display section and select "0" from the dropdown list corresponding to the field saying, "Show this number of Recent Documents" as highlighted in the image shown below:

- Finally, click on the OK button in order to save your settings as highlighted in the image shown above.
In this way, you can easily clear or disable the Recent Documents List in Microsoft Word using the methods described in this article. These methods are quite simple and convenient to use and they will enable you to either clear the Recent Documents List temporarily or disable this feature permanently.
![]()
Kevin is a dynamic and self-motivated information technology professional, with a Thorough knowledge of all facets pertaining to network infrastructure design, implementation and administration. Superior record of delivering simultaneous large-scale mission critical projects on time and under budget.
How To Clear Microsoft Word Recent Documents
Source: https://appuals.com/how-to-clear-or-disable-the-recent-documents-list-in-microsoft-word/
Posted by: webbrespen.blogspot.com

0 Response to "How To Clear Microsoft Word Recent Documents"
Post a Comment